skinnerguscassel
Member
I purchased from United RV a Suburban 6 gallon RV water heater - SAW6DE which is supposed to be a direct replacement for the Atwood GC6AA-10E. However on the old Atwood there are four wires whereas on the new suburban there are only three. I have been doing some research and according to many forums online I should have bought the SAW6DEL, however, United RV said what I did purchase should work. I need help with the wiring I do not want to have to change what I do on the inside of the camper. When I want electric hot water I want to be able to simply turn on my switch to electric hot water. If I want to use gas I would like to be able to turn the switch to gas. Will I be able to wire the new suburban with the three wires to the old four wire installation and be able to do that?
I am hoping to attach pictures.....
1st Picture: new 3 wire Suburban heater
2nd Picture: old 4 wire Atwood heater
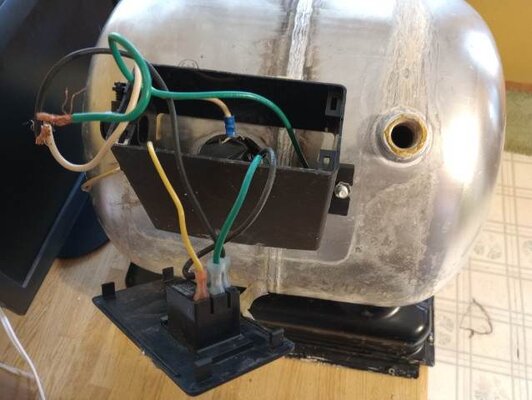
3rd: Old Atwood heater minus the Styrofoam insulation
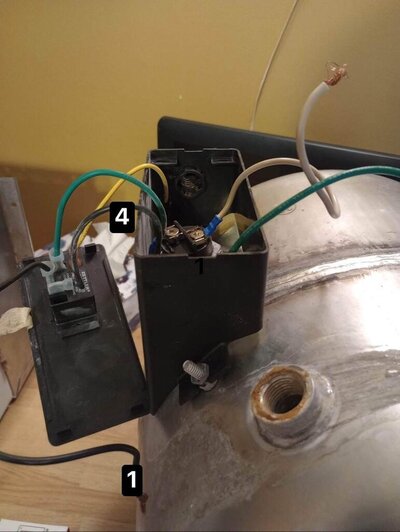
4th: Another view of the old Atwood
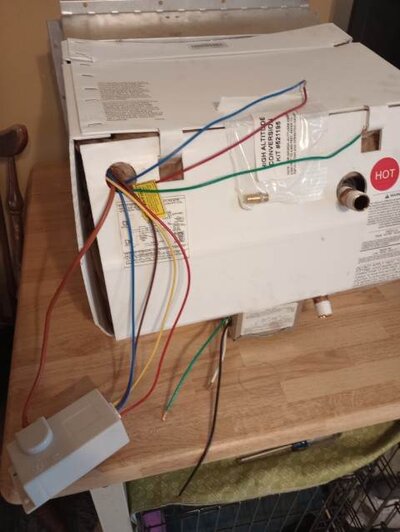
5th: Back of the new Suburban
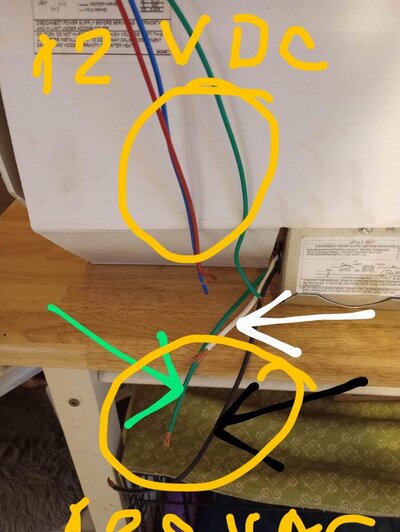
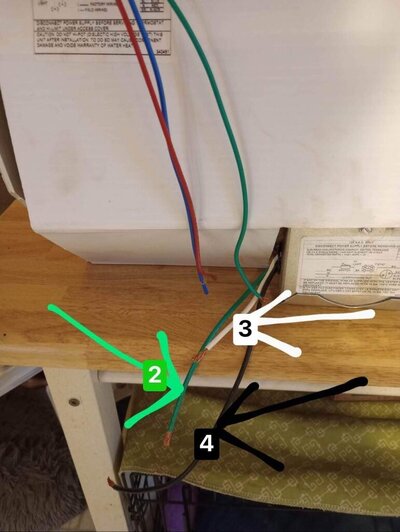
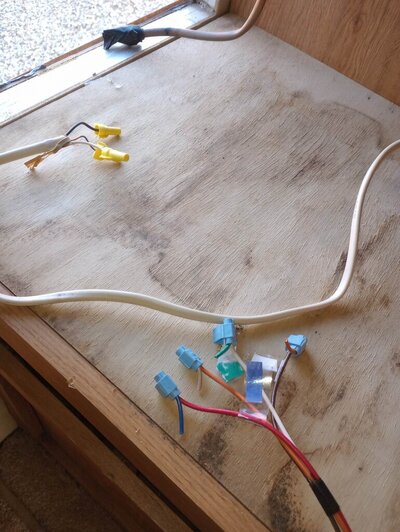
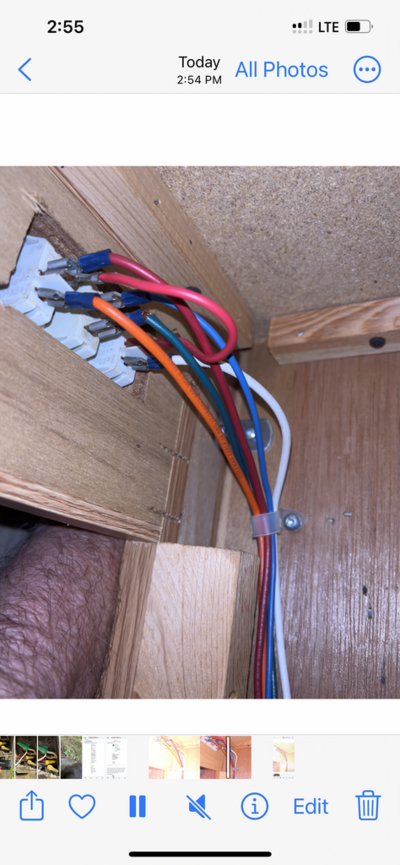
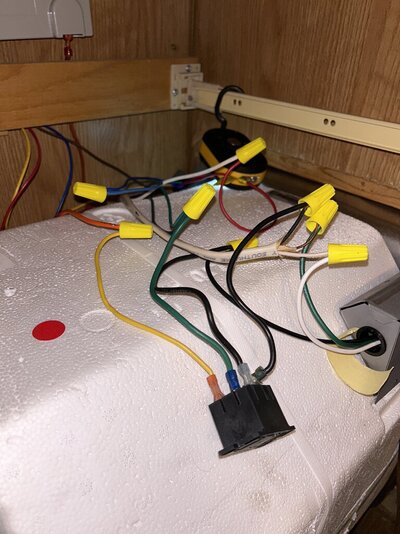
6th: where the water heater goes and the wires it attaches too.
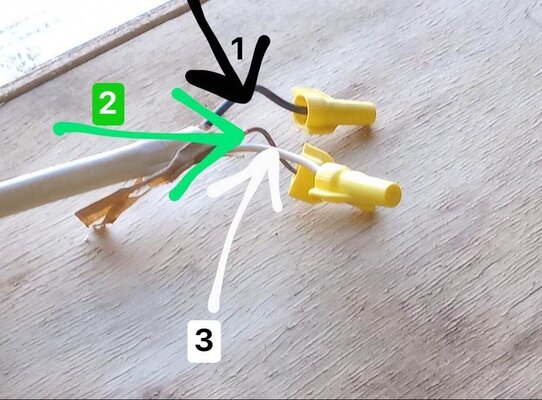
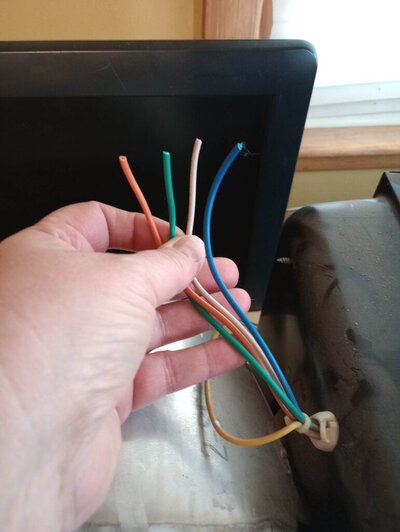
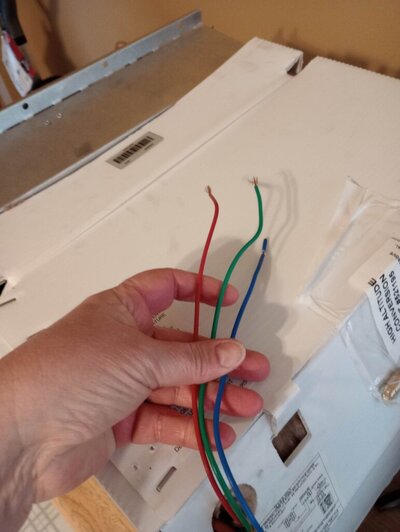
7th: close up of the existing wires. ( I keep the old wires attached so I would know how to match up the colors)
I am hoping to attach pictures.....
1st Picture: new 3 wire Suburban heater
2nd Picture: old 4 wire Atwood heater
3rd: Old Atwood heater minus the Styrofoam insulation
4th: Another view of the old Atwood
5th: Back of the new Suburban
6th: where the water heater goes and the wires it attaches too.
7th: close up of the existing wires. ( I keep the old wires attached so I would know how to match up the colors)
Attachments
-
 329732938_1594896684357536_3128011253398195717_n.jpg84.8 KB · Views: 40
 -
 328472883_761415041972615_8989272026275927206_n.jpg80.1 KB · Views: 38
 -
 336373190_546648897600174_6197369706654243744_n.jpg28.8 KB · Views: 33
 -
 336395884_974072610176140_7105567526312588336_n.jpg35.3 KB · Views: 55
 -
 329916012_1245815193006819_3862635916830053631_n.jpg34.7 KB · Views: 38
 -
 336594701_235406362356230_5934285036211941103_n.jpg175.6 KB · Views: 39
 -
 336603940_190612053705174_2042252597131169309_n.jpg179.2 KB · Views: 38